Master Homemade Blueberry Pie: Essential Tips for Flaky Crust
There are few desserts as universally beloved and quintessentially American as a homemade
blueberry pie. With its vibrant, sweet-tart filling bursting with juicy berries and a golden, impossibly flaky crust, it’s a treat that evokes warmth, comfort, and the magic of summer. While the idea of baking a pie from scratch might seem daunting, especially achieving that coveted flaky pastry, we're here to demystify the process. This comprehensive guide will equip you with essential tips and techniques to master not just a delicious
blueberry pie, but one with a crust so tender and flaky, it will earn you rave reviews.
From its humble beginnings rooted in Native American culinary traditions to becoming a celebrated centerpiece of American tables, the blueberry pie has evolved. Yet, the core elements remain: a perfect balance of fruit, sweetness, and a buttery, crisp pastry. Our focus today is on ensuring that pastry is nothing short of perfection.
The Foundation of Flaky Perfection: Mastering Your Pie Crust
The crust is arguably the most critical component of a truly exceptional blueberry pie. It’s the golden embrace that holds the juicy filling and provides a delightful textural contrast. Achieving that elusive flakiness isn't about magic; it's about understanding a few fundamental principles.
Choosing Your Crust: All-Butter for Unrivaled Flavor
While various fats can be used for pie crusts, an
all-butter pie crust is often hailed as the gold standard for its superior flavor and incredible flakiness. Butter contributes a rich, dairy note that complements the berries beautifully. When baking, the water content in butter turns to steam, creating pockets of air that separate the layers of dough, resulting in that signature flaky texture. Some recipes opt for a combination of butter and shortening, which can offer greater pliability and a slightly crispier result, but for pure flavor, butter reigns supreme. Martha Stewart's go-to *pâte brisée* crust, for instance, emphasizes butter for a golden, buttery outcome.
The Science of Flakiness: Cold Ingredients and Minimal Handling
The secret to a flaky crust lies primarily in two factors:
cold ingredients and
minimal handling.
- Cold Butter: Your butter should be *ice cold*, ideally cut into small cubes and even chilled in the freezer for a few minutes before use. When you cut the cold butter into the flour, it creates small, distinct pieces of fat throughout the dough. As the pie bakes, these tiny pockets of butter melt, releasing steam and creating air pockets that separate the layers of dough, resulting in a light, flaky texture. If the butter is too warm, it will melt into the flour, leading to a tough, crumbly crust.
- Ice Water: Similarly, use *ice-cold water*. This helps to keep the butter solid and prevents over-development of gluten in the flour. Over-developing gluten makes the crust tough rather than tender.
- Minimal Handling: Whether you're using a food processor (as Martha Stewart suggests for ease) or your hands, work the dough as little as possible. The goal is to bring the ingredients together just until they form a cohesive dough, with visible flecks of butter still present. Overworking develops gluten, which makes the crust elastic and tough.
The Chill Factor: Why Patience is a Virtue
This is a non-negotiable step for a truly tender and flaky crust. The dough needs to be refrigerated not once, but twice:
- First Chill (after mixing): Chilling the dough for at least 30 minutes (or even a few hours) after mixing allows the gluten to relax, making the dough easier to roll without shrinking. It also re-solidifies the butter, which is crucial for flakiness.
- Second Chill (after assembly): Once your pie is assembled, put it back in the refrigerator for at least 15-30 minutes before baking. This re-chills the butter, preventing it from melting too quickly in the oven and ensuring the crust holds its shape and develops maximum flakiness. This step also helps prevent the dreaded "soggy bottom" by allowing the dough to firm up before hitting the heat.
The Heart of the Pie: A Perfectly Balanced Blueberry Filling
While the crust sets the stage, the filling is the star. A delicious blueberry pie filling is juicy, flavorful, and holds its shape beautifully when sliced.
Berry Selection and Preparation: Freshness First
The quality of your blueberries directly impacts the final taste of your pie.
- Fresh is Best: Opt for fresh, ripe blueberries, ideally wild varieties from regions like Maine, known for their intense flavor and juiciness. They are a quintessential summer fruit for a reason!
- Storage Savvy: Store fresh blueberries in the refrigerator, unwashed, until you're ready to use them. Rinsing them too early introduces excess moisture that can cause them to spoil or mold more quickly.
- The Wash: Always wash berries before eating or baking. To remove contaminants, rinse them gently under cold water just before use. For an extra clean, you can swish them in a solution of 3 parts water to 1 part white vinegar for one minute, then rinse thoroughly under cold water to eliminate any vinegar taste.
- Frozen Option: If fresh berries aren't in season, high-quality frozen blueberries can be used. Do not thaw them before mixing with the other filling ingredients; simply add them straight from the freezer. You might need to add an extra tablespoon or two of thickener, as frozen berries tend to release more liquid.
Achieving the Ideal Sweetness and Texture
A great blueberry pie strikes a balance between sweetness and the natural tartness of the berries.
- Taste and Adjust: Since the sweetness of fresh fruit can vary, *always taste your pie filling* before transferring it to the crust. If your berries are on the tart side, add more sugar, 1 tablespoon at a time, tasting as you go until you're happy with the flavor.
- Thickening Agents: A thickening agent is crucial to prevent a watery filling. Flour or cornstarch are common choices. Cornstarch generally provides a clearer, glossier finish, while flour can make the filling slightly cloudier. Tapioca starch is another excellent option that provides a lovely, natural sheen.
- A Zest of Brightness: Don't forget a squeeze of lemon juice or a bit of lemon zest. This brightens the flavor of the blueberries and balances the sweetness, making the pie truly pop.
Assembling Your Masterpiece: From Lattice to Crimping
Once your crust is rolled and your filling is ready, it's time to bring it all together. The assembly process is where aesthetics meet functionality.
The Art of the Double Crust: Security and Style
A double-crust blueberry pie, often adorned with a beautiful lattice top (as highlighted by Inspired Taste), isn't just for show. The top crust helps to encase the juicy filling, trapping steam and flavor.
- Crimping for Prevention: Crimping the edges of your pie crust is about more than just appearance. It helps form a thicker, sturdier edge that effectively seals the top and bottom crusts together. For a juicy, double-crust pie like this one, proper crimping is essential to prevent the delicious filling from bubbling out and creating a mess in your oven.
- Lattice Top: If you opt for a lattice top, ensure the strips are evenly cut and woven carefully. This adds an elegant touch and allows some steam to escape.
Venting: Essential for a Happy Pie
Whether you choose a full top crust or a lattice, you must provide vents for steam to escape. If you use a solid top crust, cut several slits or decorative shapes (like small leaves) into the dough before placing it over the filling. These vents prevent the crust from becoming soggy or even exploding as the filling heats and releases steam.
Pre-Baking Chills and Egg Washes
Remember that second chill mentioned earlier? It's vital here. After assembly, chill your pie again for 15-30 minutes. Before baking, consider brushing the top crust with an egg wash (a beaten egg mixed with a tablespoon of water or milk). This gives the crust a beautiful, glossy, golden-brown finish as it bakes. You can also sprinkle coarse sugar for added sparkle and crunch.
Baking to Golden Perfection and Serving Suggestions
The final stage is baking your blueberry pie to that perfect golden hue.
Temperature and Time: The Golden Rules
Most blueberry pies bake at a relatively high temperature initially (e.g., 400-425°F or 200-220°C) for the first 15-20 minutes to set the crust quickly and start the flaking process, then the temperature is reduced (e.g., 375°F or 190°C) for the remaining baking time to ensure the filling cooks through without over-browning the crust. Keep an eye on the edges; if they start to brown too quickly, cover them loosely with aluminum foil.
Spotting the Perfect Bake: Color and Bubble
Your pie is ready when the crust is deeply golden brown, and the filling is visibly bubbling, especially in the center. The bubbling indicates that the thickener has activated and the filling is cooked through. This often takes 50-70 minutes in total, depending on your oven and the size of your pie.
The All-Important Cooling Period
This is perhaps the hardest, yet most crucial, step: *let your pie cool completely*. Blueberry pie needs at least 3-4 hours, or even longer, to allow the filling to set properly. Cutting into a warm pie will result in a runny, messy filling. Patience truly is a virtue here.
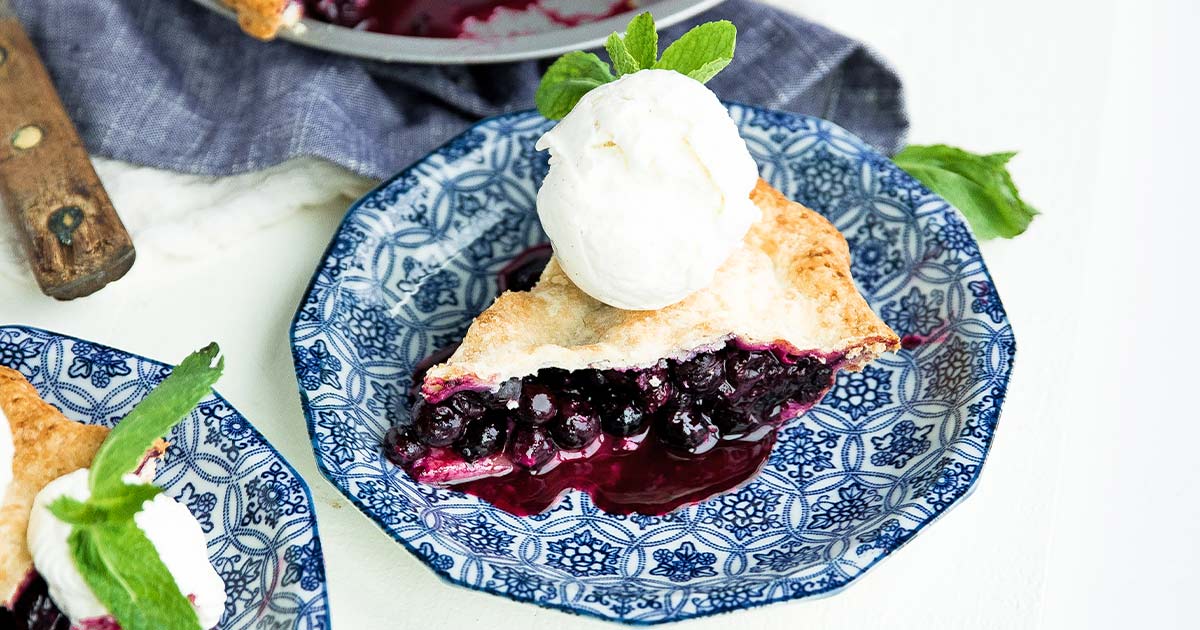
Serving: The Classic Pairings
Once cooled, slice into your magnificent creation. A warm slice of homemade blueberry pie is a delight on its own, but it's heavenly when served with a scoop of premium vanilla ice cream or a dollop of freshly whipped cream. The cool, creamy accompaniment beautifully contrasts with the warm, fruity filling.
Mastering homemade blueberry pie, particularly its flaky crust, is a rewarding culinary journey. By understanding the science behind cold ingredients, respecting the chill times, and paying attention to detail in your filling and assembly, you'll consistently bake pies that are not just delicious, but truly spectacular. So roll up your sleeves, embrace the process, and prepare to enjoy the fruits of your labor – a perfect slice of summer, any time of year.